Installing FlexiFrets

FlexiFrets® are conventional fretwire pieces, but instead of being pressed into a slot sawn in the fretboard, they ride in a small brass channel.
The installation of this channel has to be done carefully, so that each channel is the completely flush with the fretboard surface, and placed accurately on the fretboard.
The process begins with a very accurate measurement (+-.0005") from the nut to the center of the slot of the channel. This measurement can be made directly from the nut to the desired new FlexiFret® with a 24" digital caliper, or interpolated between existing frets using a 4" or 6" caliper. Of course, no one could hear a pitch difference arising from such a small measurement error. We just don't want errors stacking up (or multiplying!).
The actual measurement is longer by the distance from the edge of your router base to the center of the cutter. It helps a lot here to have the digital caliper, since you can simply zero the calipers at that offset, then read measurements directly off my fretting chart.
The setup for cutting the slot is pretty simple. A small square is clamped onto the fretboard. It is left loose while the distance from the nut is being set, then clamped tight.
The 3/32" slot for the channel can be easily cut into the fretboard with a Dremel variable speed Moto-Tool, held in a router base. The tool used is a carbide end mill, .090" (which is then dressed to the final .09375" width and thickness with a fine machinist hand file.)
The next task is to glue the channel in place with epoxy cement. The channel is held at the proper height by clamping a small fixture to it.
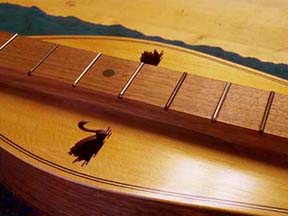
The last step is to insert the fret wire pieces and test for flatness between neighboring frets, to insure against buzzes. Then, tune up, check again for buzzes, and enjoy your new FlexiFrets®!
If you have a luthier or guitar shop nearby who can install it, or want to do it yourself, see the Price List for cost, then How to Order for more details.
Here is an in-depth description of the materials supplied, tools you will need, and the installation procedure.
Tools
Kit materials
Cutting the Slot
Fret Instertion
Hey, what could go wrong? Problems!
- Check intonation. Tune up, slip in your new FlexiFret, and try it out using a tuning machine, your ear, or harmonics to test whether it was put in the right place. If you got it placed wrong and the fret is sharp or flat, see "Sharp or Flat Fret" in "Problems."
- Now, start enjoying your new FlexiFrets!